Pages

Showing posts with label Beauty Tips. Show all posts

Friday, July 27, 2012

Fab Find Friday! 5 Reasons I'm Using Noxema + Ode to 90s Slang

-This stuff works!-


Hey Guys!


Remember this 90s Noxema Icon?!
For those of you that don't know I'm borderline obsessed with everything 90's (excluding some elements of fashion- but hey nothing is perfect). From its music, to its TV shows, movies and artsy vibe, the 90's was da bomb. And yes, as an ode to the 90's this post will be sprinkled with 90's slang and terminology. You're welcome. ;-)


Anyway, back to making this a beauty post. This summer, a friend of mine experienced sunburn and I recommended Noxema to help soothe her burnt skin.  At the mention of Noxema, I felt all old school and nostalgic memories of 90's Noxema girls splashing the smiling faces over sinks came to mind. Now, Noxema girls were the originators of excessive face splashing commercials. These new millennium Neutrogena girls are just bitin'. So, I decided to buy Noxema and see if it was really all that.


Here are 5 reasons I think Noxema is Dope:


1. It's great for normal to combination skin! I have combination skin and think Noxema works really well. It doesn't dry out my "dry spots" yet doesn't neglect my oily T-zone. It provides a perfect balance for my skin and it leaves my face feeling fresh, clean and never tight or dry.
2.  Its smell! I'm actually a big fan of minty scents. I feel like they are rejuvenating and refreshing and Noxema is both. Sometimes my face needs a boost, especially when I wake up and the menthol in Noxema delivers. I also like the subtle minty tingle.
3.  It's inexpensive. I felt like slapping myself once I realized that I've spent hundreds over the years on department store cleansers and/or the pricier drugstore brands and they never really worked for me. They were just like yeah, whatever. Noxema works better for me and it's like $4 a jar!
4.  It doubles as shaving cream. Yup, that's phat! I hate shower clutter so the fewer items in the shower, the better! Word.
5.  It's excellent at providing sunburn relief with it's cooling menthol and soothing moisturizers. For best results, refrigerate the jar first then apply. 


So, are you down with Noxema yet? Give it a try!


Peace Out.


XOXO,
Moni


Friday, July 20, 2012

Fab Find Friday - 100% Pure Face & Eye Cream!


Hi Everyone!

Today's Fab Find Friday feature is the Acai Berry Antioxidant Face and Eye Creams from 100% Pure.  I have sensitive skin and my face can be especially sensitive, so for the most part, I try to use natural products to moisturize and maintain the skin on my face.  I've been looking for a face and eye cream for some time now. I've tried various brands, some bad, some good but all overpriced.  I didn't want to spend a ton of cash but didn't want to compromise quality either. Then, I came across 100% Pure.  They use quality, all natural, vegan ingredients and promise favorable results. And, I purchased the face cream/eye cream duo for $39!


I've been using the eye and face cream twice a day for about 3 weeks now and actually have seen noticeable results. I mean, my lines are not gone or anything, but I have to say my laugh lines/crow's feet have definitely softened.


I'd totally recommend giving this brand a try, especially if you're looking for a reasonably priced natural line. They have a nice selection of various beauty products on their website as well.


Check them out @ 100percentpure.com


Got any beauty product reviews to share?

LMK in the comments below.

XOXO
Monica

Friday, July 13, 2012

Fab Find Friday - e.l.f. Beauty Products @ Target!

Hello Beauties!


I was totally stoked when I discovered Target's amazing selection of cosmetics and beauty products! We all know that Target offers great prices, but I was especially pleased when I saw the variety of quality beauty products that they offer - from makeup to makeup brushes, removers, nail art decals, name brand nail polishes and more! My fave find was the e.l.f. line of cosmetics and beauty products. They offer makeup products brushes and applicators and ranging from $1-$3! Here are some items that I scooped up and would recommend:


Tinted Moisturizer:


I recently ran out of the SkinnyGirl tinted moisturizer I usually use and thought I'd give this one a try.  There are lots of tinted moisturizers out there and some can be quite expensive.  I'm not into spending the big bucks on basic cosmetics so I was pleased when I saw that e.l.f. offered this moisturizer for only $3! It's lightweight formula is great for summer and it has spf 20, which is a must. 


Makeup Remover Wipes:


I love this concept. Long gone are the days of rubbing your eyes with a piece of cotton soaked in makeup remover trying desperately to remove stubborn eyeliner and mascara. I normally use Pond's & Nuetrogena for this kind of thing, but e.l.f. offers a good alternative.  They are also $3 a pop, so you really can't go wrong.


Eyeshadow brush:


OK, so I'm always floored when I see how expensive makeup brushes are! I mean I can understand the expense for makeup artists, but I'm pretty practical with my makeup application so I don't require anything fancy.  Target offers an array of e.l.f. makeup brushes for only $1! Ah-mazing! I grabbed this lil guy and am pleased with the results! C'mon, at $1 each, they're totally worth the try!


Have any great beauty finds? Please share them in the comments below! :)


XOXO,
Moni

Tuesday, July 10, 2012

Beach Tanning Tips!


Hey Beauties!

This past weekend I hooked up with friends and headed to la playa (beach in espanol)! :)
So, I'll be honest, in spite of all the news reports & my new found crows feet, ahem, I mean "laugh lines" - I still love to tan! But in my 30 years, I've grown wiser on how to achieve a healthier tan and avoid sunburn and skin damage! Check out my "tan technique" below:

Tan Technique:
Leave the house with a sunscreen of at least an spf 15 or above already on your face. Your day time face lotion should already contain sunscreen. If not, buy one that does. :)

As soon as I arrive to the beach and set up shop, I lather up my back, chest, neck and face again -including ears- with spf 15 or 30.  I apply a tanning oil with spf 8 to my legs and arms since they rarely burn and my legs are especially white and the hardest part of my body to tan.

Once I'm lathered up, I lay in the direction of the sun and rotate with the sun as it changes it's position. This may sound weird, but it is key to obtaining an even tan.  Once you're done on the first side, lather up your backside and turn over.  I usually tan for 30 minute intervals on each side, so I can get a good gauge on my tan progress and this also helps prevent burning.

Remember, ALWAYS reapply sunscreen after (even before) getting in the water, even if your sunscreen is "waterproof."  Multiple layers of sunscreen really helps prevent burning and skin damage.


Tan Line Tip:
I also try to wear strapless bathing suits and bandeau tops to avoid ugly tan lines.  But, if you do get tan lines, apply sunless tanner after you shower and this will help blend in the uneven skin tones. I also usually apply self tanner every couple of days in between beach visits to amplify & maintain my tan. This really helps achieve the ultimate "golden glow" and blend in any inconsistencies in color. The best part is, when you apply self tanner to already tanned skin, it looks super natural and rarely ever looks streaky!


Don't forget your hat to help protect your face and hair!

It's always fun in the sun! ;-)


Have any beach or tanning tips to share? Include them in the comments below!


XOXO,
Moni

Friday, July 6, 2012

Fab Find Friday!

Hey Loves!


I'm starting a new weekly post called "Fab Find Fridays" that will feature something fabulous each week, whether it be a beauty product, an amazing store, salon, sale, bargain or a beauty technique. I'm always on the look out for new products, great deals and time saving beauty tips, and I'd love to share these with you in these weekly posts.


Check out this week's Fab Find Friday!


  European Wax Center - waxcenter.com


Now, there aren't many things I hate about summer, but bikini waxing is definitely one of them! Now, yes we should all be well groomed all year round, but let's face it ladies, this is not always the case, especially during winter months.  During those cold pale days, you can get away with moderate shaving and trimming and take a break from the aggressive pulling and plucking.  But it's summer and waxing is the best way to ensure a clean, bare beach look.


But, where should you go for a waxing or should you just do it yourself?  Well, there are a variety of spas and salons that offer waxing, but the better ones (and you do want a better one) will definitely cost you ... until now!  Check out European Wax Center.  They are a nationwide chain of quality wax "spas" that offer a variety of waxing services for men and women.  The best part is that you get your first bikini line wax (or other promotional wax) free! Yup, free, no gimmicks. If you want a more extensive waxing like a full bikini wax or Brazilian wax, you get 50% off your first visit. They also have a rewards type program that offers you $5 off a visit for each friend you refer to the salon.  


I recently went to the European Wax Center in Rutherford, NJ with a friend and we both had good experiences.  They used quality hard wax, the place was spotless and the staff friendly.  But, yes the waxing still hurt like heck. :-/


They also have a pre and post waxing skin care line which was nice but overpriced. It seems as if you could get similar products at your local drugstore for much less.


For those brave mavens that aren't afraid of a DIY bikini waxing, check out my post on DIY bikini waxing for some tips: http://monismix.blogspot.com/2012/05/skinny-on-diy-waxing.html


Have a wonderful weekend!


XOXO, 
Moni

Tuesday, July 3, 2012

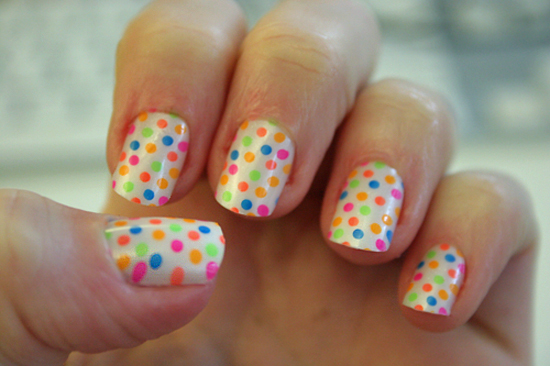
Simple steps to nourish dry, brittle nails!


Nail art, nail polish and gel polish, oh, my. I'm a huge fan of the the nail art/nail polish boom! I think it's great that everyone has stepped up their nail game.  However, it seems as if with each polish change (and I do 2-3 per week), my nails get more and more brittle and therefore crack, peel and chip easily. 

So, I've identified a few simple steps to help nourish dry, brittle nails to strong, healthy nails!

Step 1: Use a gentle moisturizing nail polish remover like Sally Hansen's Moisturizing Nail Polish Remover. ($2-$3 at drugstores).


Step 2. When your nails need a trim, use a nail file instead of a nail clipper since nail clippers can create more ridges and cracks in nails. 


Step 3. Buff away any unwanted ridges. A buffer is my manicures best friend. It gives the illusion of a smooth nail bed and can even gently remove unwanted cuticle regrowth!


Step 4. The Olive Oil Soak. Do this as often as possible in between polish changes, sort of like a "deep conditioner" for nails. Once your polish is removed and your filing and buffing are done, dip your tips into a small bowl of olive oil for 5-10 minutes. Then wash and dry your hands well to remove oily residue. Now, you're ready to begin your polish routine!


Step 5. Use cuticle moisturizer daily. While many of us use hand moisturizer daily, it's also important to target your cuticles to give them the moisture they need. This helps prevent unruly cuticle regrowth as well as prevent hang nails. (Try Burt's Bees Lemon Butter Cuticle Cream, $8 drugstores).

Hope these tips help! Got any great nail tips to add? Please share them in the comments below!

XOXO
Moni

Tuesday, June 26, 2012

Best Brown Bronzer!


Calling All Bronzer Lovers!


Ok, so there are many bronzers that I've tried, some that I like and very few that I love. Well, please welcome Bare Minerals Deep End bronzer to the "love" list! I ordered this bronzer through QVC since my fave Tarte bronzer/brush duo was unavailable. I just received this bronzer and it is the bomb! It has a very nice brown hue to it, so it provides a great faux, natural looking tan. It's part matte with a bit of shimmer, but not so much shimmer so you avoid that sweaty/oily look in photos. Plus, it's a natural product, so it's gentle on your skin AND it is long-lasting which is rare for the more nature friendly brands. So, for all you bronzer lovers out there, go out and give this "bronza" (NY accent) a try! You won't be disappointed.


P.S. - if you order this through QVC, you get a bronzer brush to boot.  It comes out to about $33 with shipping.


XOXO,
Monica

Thursday, June 21, 2012

Long-lasting Lip Creme Gloss!


ATTENTION all my lip gloss and lipstick lovers!


NYX has a great line of lip cremes that are part gloss, part lipstick. I recently picked a couple of tubes up and have to say, I am thoroughly impressed with the quality, look and feel of this lip creme.  It is long lasting without being thick and sticky (perfect for summer)! These cremes provide superior coverage and glide on smoothly and leave your lips feeling soft and plump. At $6.00 a pop, you can't go wrong. Give em' a try!


XOXO,
Moni

Friday, June 8, 2012

Summer Beauty Favorites


Hey Guys,


Summer is fast approaching and I'd like to share some of my summer beauty faves with you! Check them out and feel free to share some of yours with me too. :-)


Self Tanner
This is a beauty staple for me all year round, but when the weather is warm and more skin is shown, I apply self tanner once or twice a week. My current fave is Santa Tanita from Urban Decay. This is actually discontinued in stores but is available on the web on sites like Amazon.com. I love this formula because it is a light weight mousse that dries fast! It's also tinted so you're less likely to streak.  In fact, I have NEVER streaked with this formula!


Hair Care
During summer, your hair is exposed to the sun, salt water and chlorine. So in order to keep your hair looking healthy, condition, condition, condition. I mean, I hit the conditioner hard during the summer and so should you.  


Here are some recs for a conditioning routine:


Skip the shampoo
My hair could use a good lather about once a week or so. But other than that, I skip the shampoo and co-wash (conditioner wash) my hair. One of the best products on the market today is the Wen Hair Care system. This stuff works well and really nourishes my hair.  It even doubles as a super rich leave in conditioner which is KEY during the summer months.

Wednesday, May 23, 2012

How To Achieve Humidity Friendly Curls


Hey Guys! The weather in NYC has been really humid lately. So, instead of fighting the frizz, I thought I'd embrace it.  My hair is naturally curly and although I use the Keratin Treatments every 4 months or so, my natural curl still comes out. Normally I use a big barrel curling iron to smoothe out the tight curl and create a tousled beachy, bouncy look.  However, on super humid days, it's just a waste of time. The big curls drop and my hair looks a hot mess.  So, I've decided to incorporate medium sized ringlets to blend in with my natural curl.  And, I've been pleased with the results. 


Here's how I achieve my look:


First, I wash my hair the night before and go to sleep with it dry or slightly damp.  This is what I wake up with (see upper left hand corner pic).


I then use a 3/4 inch curling iron.   For these curls, the iron does not have to be super hot, so I would recommend an inexpensive brand like Conair or one that you find at a local Beauty Supply store.  I bought the one featured above at Walmart for $13.


I part my hair in half vertically and begin curling small pieces of hair working my way from the back of my head to the front.  Now, I'm not going for a super precise look here, so each piece of hair does not have to be curled.  I usually curl the majority of the upper half of my head and a curl a few straggly looking ends as needed (check out the pics above).


Once I am please with the result, I slightly loosen the curls with my fingers since I am not going for a Shirley Temple look.  


When you're done, you can add a finishing spray to better hold the curls in place. I usually limit my use of hair spray, so I don't apply it unless I have evening plans and want to maintain my look. 


This entire process takes me approximately 10 minutes.  


Overall, the beauty of this do is that even though your hair may frizz a bit, it blends in with both the natural and manufactured curls. Think Sarah Jessica Parker in her Carrie Bradshaw glory days.


XOXO,
Moni <3


Friday, May 18, 2012

The Skinny on DIY Waxing


Before I stopped drinking, I'd have a glass or two of wine, gather up my courage and heat up the hard wax needed for the deed. It was beach season again and a clean shaven maven was just not enough. The tell all sun of the beach was merciless shining light on even the lightest bikini line stubble. So, I'd take a breath, apply, allow to cool and ... rip! And after multiple repeats, reheats and *bleeps*, it was over. Or was it? Sometimes I noticed that even after multiple strips and rips, I was never quite..ahem..bare. In addition to waxing, I'd have to shave or *cringe* tweeze the rest. However, I learned that besides the obvious pain, I became more prone to ingrown hairs when I waxed myself. It turns out that there's a technique to waxing when you DIY:

1. Prep work: When warming wax, use extreme precaution. Make sure the wax is warm and NOT hot. The consistency of the wax is a great indicator of its temperature. When the wax is too thin, that means it's very hot and you need to cool it 1-2 minutes before applying it to the skin. Warm wax will have a thicker (not gooey) consistency.  Gooey wax means that it is too cool and needs to be reheated.

Prepare linen strips if required, have a wooden spatula, have oil, powder and lotion as well as a towel and/or disposable napkins. (Powder to apply to skin prior to waxing to absorb any moisture, oil to remove excess wax once you're done and lotion (or cooling gel) to soothe area post waxing).

2.  Apply powder to skin before the wax to avoid skin irritation.

3.  Apply the wax from inside out pulling the hair in the reverse direction of hair growth.

4.  Make sure you pull the skin tight - no bending. This will cause less pain and achieve a cleaner, smoother result.

5.  Remove excess wax with mineral or baby oil. To avoid irritation, use a medicated ingrown hair preventative cream immediately after waxing and for the next couple of days. This step is crucial to avoiding ingrown hairs. I would recommend Bikini Zone's Medicated Gel. There are pricier brands out there but this brand works just as well.

6. Do not take a hot shower directly after waxing and no sun or tanning beds for 24-48 hours.
If all of this information scares you, visit a good, clean well reviewed salon. ;-)

XOXO,
Monica

Wednesday, May 16, 2012

Combat Seasonal Puffy Eyes with This!


This allergy season has been brutal to my eyes! Some days, I wake up with puffy, itchy eyes that make me look tired and older! Needless to say, I was on the market for a quick morning fix. After I wash my face with cool water (warm water can irritate sensitive eyes), I apply this little miracle worker as a base to my under eye concealer and it dramatically reduces the swelling. If you're experiencing puffy eyes, I would totally recommend MAC's Fast Response Cream. But, keep in mind it's not super moisturizing, so I would recommend using a rich eye cream at night to make sure your eyes are getting the hydration they need. And remember, water, water, water. The more H2O you consume, the better your skin looks and feels. True Story.

Tuesday, May 15, 2012

Liquid Liner by NYC Cosmetics


I'm totally digging the winged eyeliner look these days. Liquid liner and I have not always had a great relationship.  Either the liner would cake, smudge or the application would be uneven. But, it turns out, I was just using the wrong liner!  I found out about this amazing black liquid liner from the NYC line. It works great and applies evenly, but the best part is it's only $4 a pop!  
 
Site Design By Designer Blogs